As an Amazon Associate I earn from qualifying purchases. When you use our links, we may earn an affiliate commission. Learn more.
Brewing coffee is a skill revered by many.
In recent years it’s more than the process of boiling the kettle and throwing in some instant granules. Oh no, coffee these days is a work of art.
Making sure you can do that art justice is complicated.
There are so many out there claiming to brew the best coffee, you take a chance, and it will taste like bitter dishwater.
Not good.
We need coffee so great it powers us for the day, warms our souls, and would rival Luke and Lorelai’s endless coffee bits.
So without further ado, let us give you the ultimate guide to coffee brewing methods.

Get your beans at the ready!
The Best Coffee Brewing Method
In a hurry? One of the best and easiest ways to brew coffee is with the humble French press! It’s cheap to purchase and is widely available, both online or in a local supermarket.
To make a strong cup of French press coffee, you can follow this simple step-by-step guide:
- Boil your water
- Use a scoop or spoon, and put your coffee into the bottom. Depending on the size and amount of coffee you want to make, the coffee amount will change. As a rule, four scoops are good for two strong coffees.
- Once boiled, pour the water over the ground coffee. Fill the French press, leaving room for the lid at the top.
- Place the lid on top, but do not push the rod down yet! Leave the press like this for roughly 10 minutes, depending on the coffee and size.
- Once the time has passed, push the rod down slowly. This will separate the ground coffee from the water.
- Pour into cups directly from the French press and add milk or sugar as desired.
- To clean, we recommend washing away the remains of coffee and leaving it to soak with some soapy water while enjoying your cup!
First off, let’s consider the different ways we can brew coffee and what we mean by that.
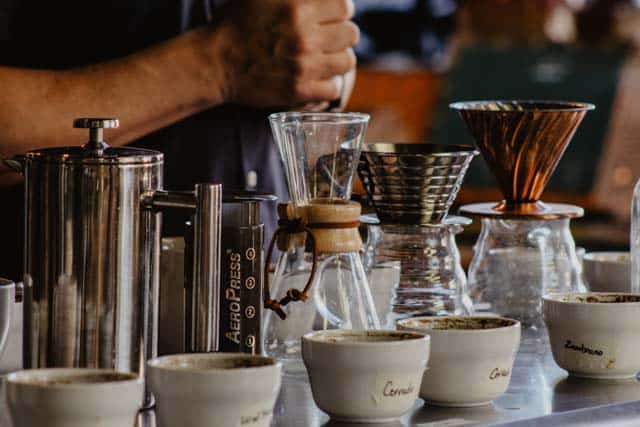
There are a few different ways to brew coffee, which will impact the result that goes into your cup.
What kind of coffee?
When brewing coffee, we should also consider the kind of coffee you want.
READ NEXT: What is a Breve Coffee?
Are you after the most robust, most potent coffee known to man that will leave you in a caffeine daze all day?
Or perhaps you desire a sweet, silky glide down your throat cup of goodness?
Whatever your coffee of choice, it’s essential to pick the one you will enjoy most. If you aren’t sure, then is now not the perfect time to experiment?
You can check out our other article all about the best coffee beans here to help make that choice.
Brewing vs. steeping
Have you seen some coffee brewing vocab that’s left you a little flummoxed?
We all start there, stick with it, and you’ll be a pro barista too! Before we get into the nitty-gritty, let’s talk about what we mean by brewing and steeping coffee.
Generally speaking, there is little difference between the two.
Steeping is another word for immersion and is the most fundamental and longest-standing method of brewing coffee.
You may also see the phrase slow-drip, which again is another form of brewing coffee. These are all different versions of brewing coffee, and the method will impact the result.
Coffee brewing methods
There’s a wide range of ways to brew your coffee, which we will look at now to help you find the best one that suits you and your needs!
There’s a brewing method for all budgets, so fear not, a great cup is not out of the reach of a student budget!
1. Espresso machine
The espresso machine has been keeping caffeine in our blood for generations.
Today the market is saturated with the espresso machines claiming to offer fancy new features and gimmicks, be wiser, and don’t fall for this!
Essentially, the basics are still the same.
Water is pressurized and pushed through a chamber of finely ground coffee beans, through a filter, to birth what we know and love, the espresso shot.
Arguably the only shot you can have at 6 am without being judged or on Spring break.
Now the cost of these can vary, and the choice is a little overwhelming at times but set a budget, stick to it, and you should be okay! The time it takes to get the coffee down in one depends entirely on the machine.
Read next: Jura Coffee Machines
If you’ve gone commercial, it can take anywhere from 15-40 minutes to warm up, whereas a home-based machine can be ready to rock in 3 minutes.
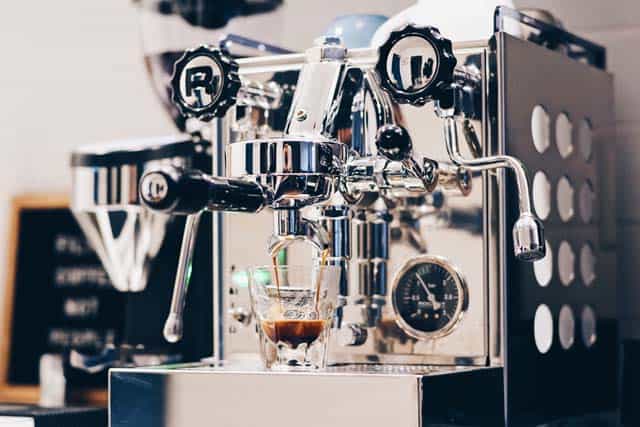
Once it’s all warmed up, within 30 seconds, you will have your coffee fix. To achieve the coffee of dreams, you will need a fine, consistent grind. Ready for the top tip?
Pinch your grind; if it clumps in your fingertips, it’s the one. If it is too coarse, it won’t clump; too fine, and it will be an excessive clumper.
The result should be strong, sharp, and full of flavor!
You can add some hot water to create an Americano or froth some milk for a creamier cup. Or you can be hard-core and get it down in one, once it’s cooled, of course, no one wants to lose their throat linings that early in the morning!
In terms of skill level, it’s again dependent on your machine.
Some machines will automatically pump out a great long shot espresso; others, generally commercial, will take a higher skill and training to master.
If you like a frothy coffee full of milk, looking at you latte lovers, or those after that quick and sharp caffeine shot, this is the method to go for!
READ NEXT: Cortado vs Latte
Those after a subtler brew will find other brewing coffee ways a great option! Keep on reading for them, go on, you know you want to!
To use your espresso machine, follow these simple steps for the caffeine hit:
- Turn on and preheat your espresso machine. Remember the time it needs will vary based on each machine so allow plenty of time!
- Measure and grind your beans. Fill the portafilter with these grinds; around 20 grams is a good amount to start with.
- Use the best espresso distribution tool that is correctly sized for your portafilter. By distributing the coffee you will reduce the risk of channeling which can result in a bitter coffee flavor.
- Tamp the grounds, so the bed is flat and even. It’s a good idea to do this over a larger cup to avoid a gritty work surface! Pressing down straight is the best way to do this with a good amount of pressure.
- Pull your first shot; this can take anywhere from 20-30 seconds per pull. The coffee should pour into your mug set below to deliver that glorious espresso.
- Take note of the shot, and here you can adjust it if you see fit. A taste test here is a good idea; if the espresso has a sour taste, you may want to opt for a coarser grind, remember it can be a process to find the perfect grind!
- Steam your milk by using cold milk poured into a stainless steel milk pitcher. Turn your steamer on and froth the milk to your desired consistency. It’s best to keep the steamer wand just below the surface during this time.
- Once the consistency is achieved, plunge the tip into the milk’s bottom to steam until the desired temperature. Heat is essential for your milk steaming, and it may take practice to get it just right!
Pros
• Fast to brew once warmed up
• Creates a highly concentrated, sharp coffee
• Ranges in price from affordable to expensive
• Easy to use depending on the machine
Con
• The quality of the machine varies with the price.
2. Moka pot
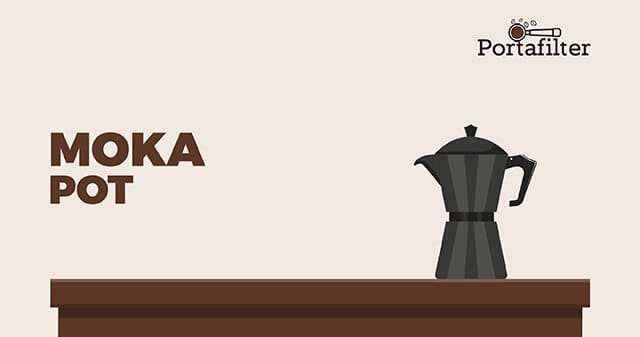
Those who perhaps do not have the budget for anItalian coffee maker but still want the kick you get from a pressurized brew should strongly consider the Moka pot, also known as the stovetop espresso maker.
Made of 3 chambers, this is where the magic happens.
The bottom chamber boils the water; with the steam, the pressure pushes water through the top chamber’s coffee grounds.
It’s not the easiest of processes and should result in a bittersweet and super-strong coffee to get you through the day!
You can make multiple cups with one brew, anywhere from four to sixteen.
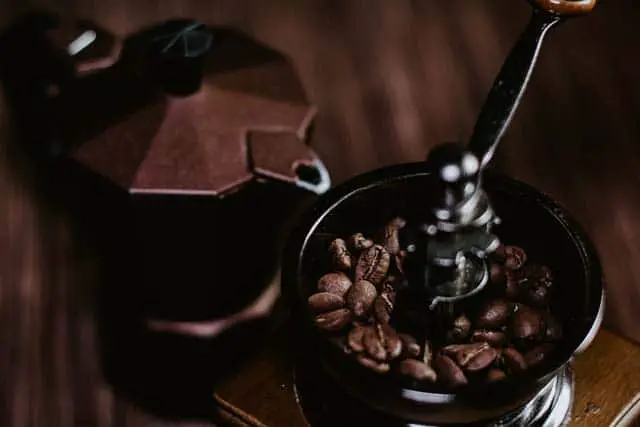
It’s a high-speed method; once your water boils, it shouldn’t take more than 5 minutes, so great for those morning coffees.
Finding the right grind can be a little difficult; you want something coarse but also fine. Helpful, I know! Generally, trial and error is an excellent way to go with the Moka pot method to find the grind that works right for you.
Once you have the grind sorted, the process is straightforward, fill the chambers, turn the heat on, and be sure to keep an eye on it!
It’s a super portable and also affordable way to brew coffee for that espresso-style brew at home!
To use your Moka pot, you can follow these simple steps below:
- Preheat the water by bringing kettle water to a boil and removing it from the heat. This prevents the Moka pot from getting too hot and causing a metallic taste in the coffee.
- Grind your coffee on a drip coffee setting; you will need enough coffee to fill the filter basket, around 2.5 tablespoons, depending on the size of your pot.
- Add the heated water, filling the line on the bottom of the filter.
- Insert the filter basket into the brewer’s bottom
- Fill the basket with coffee, molding slightly, and level the surface off with your finger. A flat top is desired here.
- Screw the top and bottom together. Be sure to use hot pads and not over-tighten the pieces as they join.
- Put the brewer on the stove over moderate heat. Be sure the handle is away from the heat and the top lid is left open.
- The coffee should come out when you hear a puffing sound and see rich-brown steam. This steam will become lighter in color. Once the steam is the yellow honey color, take the pot off the heat with hot pads and close the lid.
- Wrap the bottom of the pot with a chilled towel or run under a cold tap to stop the extraction. This will help prevent the coffee from developing that metallic taste.
- Once the coffee stops bubbling out, pour it into your cups. It is at this point you can dilute further with water depending on preference and add milk.
Pros
• Very affordable
• Quick to brew
• Portable with mini pots available for traveling
• Can make multiple cups
• Easy to use
Con
• Can take a while to find the right grind
3. AeroPress

A firm face in the traveling coffee community is the AeroPress, with many claiming it’s the best coffee they have ever tasted! I bet that claim piqued your interest.
A three-piece tool that allows you to create fantastic coffee with minimal effort.
We like the AeroPress method because you can make regular coffee, a cold brew, and almost espresso. All your coffee wants and dreams are covered here!
It’s a super-fast method to make coffee; the quickest can be done in 60 seconds providing the water is hot enough! Great for that post-gym pick-me-up!
The Aeropress does only make two cups of coffee per rotation, so you are in for the long haul if ALL your friends suddenly decide they want a cup of coffee.
It also requires paper filters, which can be wasteful, be sure to look for some biodegradable ones to do our bit for the planet!
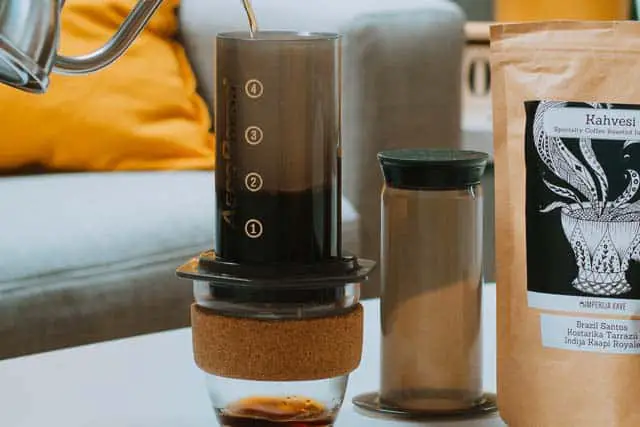
We are about to blow your mind here because you don’t need to worry about the grind! You get a different result based on your grind, so you can choose the one that best suits your mood!
An AeroPress is easy to use, and the result is a cleaner style of coffee. Think smooth, creamy, pure, and fast (this may be very similar to Aeropress’s slogan!).
To brew coffee with an Aeropress, you can follow these simple steps:
- Push the plunger out of its chamber.
- Place a filter in the filter cap and twist the cap onto the chamber.
- Stand the chamber on a sturdy mug and pour one rounded scoop of coffee into the chamber. We recommend a fine drip grind for this method.
- Shake to level the coffee in the chamber.
- Add water at 175F for a hot brewing into the chamber. Fill up to the Level 1 mark. For those looking to make a cold brew, water from the tap will suffice.
- Stir for roughly 10 seconds for those after a hot brew. Keep stirring for about a minute if it’s a cold brew coffee you are after.
- Insert the plunger and press gently; be sure to pause if you feel any resistance. Keep going until the plunger reaches the coffee grounds.
- Remove the filter cap, push the plunger to eject used coffee, and rinse and seal.
- Enjoy your coffee! Those after an espresso-style can drink as is, or you can add milk to create your desired drink. Those after a cold brew coffee should add ice or tap water to their coffee; around 8oz will provide a mug of chilled goodness!
Pros
• Very portable
• Can customize your brew to suit your taste
• Provides a great, clean coffee
• Speedy brew time
• Delivers the best coffee
Con
• It only makes 2 cups per rotation.
4. French press coffee

An excellent option for homebrews is the humble French press.
Usually affordable, you can pick these up in most supermarkets for less than $20. It is also relatively easy to use and leaves you with a different-tasting coffee.
It usually takes around 10 minutes or so from boiling to sipping time, so it’s not the quickest, but it isn’t the slowest! It is best to keep your eyes firmly on your French press while your coffee steeps too.
A coarse grind is the best option to go for with this method for brewing coffee.
If the grind is too fine, it will get stuck in the filter and bass into the brew, resulting in a bitter mess in the morning; I know, makes a change from that being your sister!
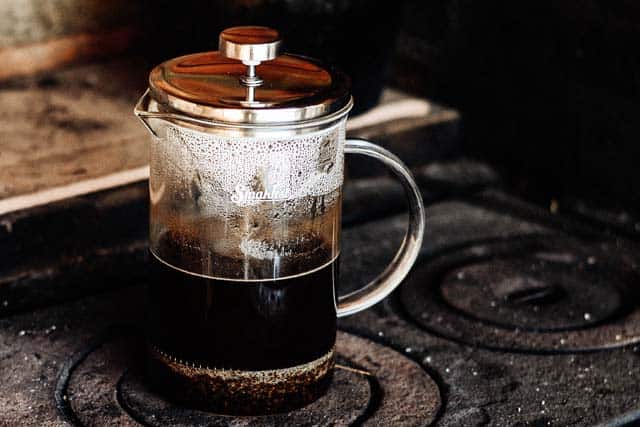
The finished brew can taste a little sediment-y towards the end, so we recommend avoiding the last few sips of the cup.
Aside from that, the coffee is full of flavor and non-harsh, depending on your beans.
The humble French press is available in a range of sizes, so whether it’s a cup for one or a houseful, it should not take you too long to get those cups full of great coffee! Although there are stainless steel versions available, they are usually glass, so it’s not the friendliest to travel with.
These days you can even get cups that double as a press to save on washing that could be suitable for traveling.
They are handy for those one-cup moments or living alone or in a student setting. Just be sure to check the materials; you don’t want to smash your press/cup on your travels!
As well as making a piping hot brew, you can also use your French press coffee maker to make a cold brew coffee, which we will look at now.
5. Cold Brew Coffee

Stop letting Starbucks take all your money, and for roughly 20 minutes of work, you can have cold brew coffee at home!
This process is best done if you leave the coffee to be steep overnight, so this is one for the evening preppers out there!

The way we would recommend doing this is with the handy french press we mentioned earlier.
To make the cold brew coffee follow these easy steps:
- To start, pour the coffee* into the bottom of the French press. We recommend a coarse grain so that it compresses down tightly. Generally, we would double the coffee you usually put in your French press to get a coffee that packs a chilling punch.
- Fill with cold water, leave a gap at the top, and place the French press lid on top. Do not push down at this point.
- Put the French press in the fridge for at least 8 hours. We recommend overnight or a good 12 hours for the coffee to be steep!
- The next morning slowly push down the lid of the French press. This can feel very hard and stiff to do, so be sure to take your time with this step.
- You can decant the coffee into another jar to free your French press up or leave it in the fridge.
Your cold brew should last around two weeks in the fridge. It’s much enjoyed with some syrup and oat milk for a healthy yet creamy coffee!
Fair warning, this coffee can be strong depending on the grain you go for, but this handy tip will provide you with cold coffee all year round without having to fork out!
The taste of a cold brew is different from a hot coffee made in a French press.
This is down to the temperature of the water.
When hot water comes into contact with the coffee, sometimes it can burn the beans or grind, impacting your coffee’s flavor (why some heinous people add milk to their instant coffee first).
Pros
• It can be used for cold brews also.
• Decent brew time
• Very affordable
• Can make large quantities of coffee
• Easy to use
Con
• The steeping method can be tricky to perfect.
6. Softbrew

A new one on the scene is the soft brew, which has been kicking around for just over ten years. The soft brew is like a French press, but easier.
Resembling a teapot, inside there is a stainless steel filter which you fill with your ground coffee. Add hot water, let it steep, anywhere between 4-8 minutes is a good amount, and serve.
The filter inside has made up of thousands of tiny holes that allow any size grind to sit inside! Even your superfine grinds will work here, so you can be as experimental as your caffeinated heart requires.
The result should be reasonably similar to that from the French press, so you’ll get that depth, flavor, and body without the French press mess. It sounds like a winner to me!
To brew your coffee using a soft brew, you can follow these simple steps here:
- Put your ground coffee into the filter depending on your desired taste.
- Pour over the hot water, preferably off the boil, and make sure the water covers all the coffee.
- Leave to brew for around 4-8 minutes for a hot coffee. For those after a cold brew, leave your coffee overnight.
- Pour the coffee into a mug and adjust with milk or sweeteners as it suits your taste.
- To clean, simply remove the filter; your used coffee can go in your food waste bin, and simply rinse the filter underwater and dry! How easy is that?
Pros
• Easy to use
• Fast brew time
• Available in a range of sizes
• Works with any size grind
• Easy to clean
Con
• Fragile due to its ceramic design
This free cheat sheet will improve your coffee brew by providing quick information on brew ratio, grind size, optimal brewing time, and more.
7. Vacuum pot
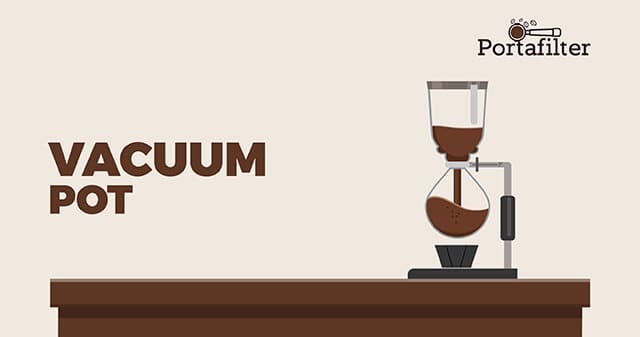
Otherwise known as a siphon pot, the vacuum pot is a unique, albeit time-consuming, way to make coffee.
The vacuum pot features a combination of coffee brewing methods, you get a full immersion brew, but the siphon action delivers a great-tasting coffee cup!
It’s a fancy and flashy way to brew coffee that can take about 10 minutes to do, and the clean-up is not a breeze. For this method, we would recommend a medium/coarse grind to get the best results.
You’ll get a coffee that’s clean and full of flavor as the coffee is only touching the glass; it’s one of the purest brewing methods out there! It can take a while to do, and you need to be involved in the whole process.
If you have the time, it’s a great way to get that outstanding quality coffee. However, those who appreciate the speedy cups of coffee will find a quicker method better suited to them!
To brew your coffee with a vacuum pot, you can follow these steps below:
- Prep the filter by pulling the chain of the metal filter attachment down and sinking it. The clip will attach to the bottom of the funnel.
- Add preheated water to the mark. Be sure the outside of the globe is completely dry to avoid it cracking when the heat is applied.
- Now we need to add some heat! A butane burner is the most effective way to do this. Turn the burner on high and place the funnel inside the globe. Angle the funnel while you wait for the water to boil. Water times vary, so be sure to keep an eye on it!
- Measure about six tablespoons of coffee and grind it to a medium coarseness, similar to table salt.
- Once the water boils, attach the top funnel securely to the globe.
- As the top assembly fills, you want some water remaining in the globe, create a whirlpool, and add the coffee directly into the water. It’s a good idea to start a count-up timer at this point.
- Lower the flame on your burner. Stir the mixture, making sure the coffee is fully immersed. After 40 seconds, stir it again. The second time makes sure you are gently folding to ensure everything is saturated.
- At 1.30, turn off the heat and give the mixture a big swirl. The coffee should draw down through the filter into the globe, finishing roughly at 3 minutes.
- Once this is complete, you can serve and enjoy. Be careful of the heat from the globe and use hot pads if needed!.
Pros
• Produces excellent coffee
• Decent brew time of 10 minutes
• Clean, pure-tasting coffee
• Great for entertaining
Con
• It takes a while to perfect, quite a fiddly method.
8. Chemex Brewer

Part of the filtration or drip coffee family is the Chemex brewer.
It makes excellent coffee and comes with the capacity to share it. You can make 3-4 cups in one go, or depending on the brewer’s size; you can make 10 cups!
Great for your coffee evenings.
It takes a bit of experimentation to get the right balance between grind size, water temperature, and coffee volume, but stick with it because the result is simply divine.
The Chemex brewer is quick, too; within three and ½ minutes from the setup, you will have a coffee in hand.
In terms of grind, anywhere between a medium to coarse, but closer to a medium, is ideal. It’s still worth fiddling about with that to get the desired result for your taste.
With Chemex, their filters are around 30% thicker than other drippers. This gives you a more rich-tasting coffee, similar to the French press, but without the sediments.
Those after a pour-over coffee moment and like an artistic coffee maker, this is the one for you!
Those who need to brew multiple coffees or travel with a brewer may struggle with this one.
To brew your coffee using a Chemex brewer, you can follow these steps below:
- Using the coffee bean of your choice, grind the coffee to a medium-coarse grind.
- Open the filter (Chemex Bonded Coffee filters are recommended!) into a cone shape, with one side having three layers. Place the filter into the top of the brewer. The thicker portion should cover the pouring spout.
- Scoop one rounded tablespoon of ground coffee for every 5oz cup into the filter cone. You can adjust this depending on how strong you like your coffee.
- Bring the water to a boil, remove from heat, and leave it for about 30 seconds; the best temperature is around 200F.
- Pour a small amount of water over the coffee grounds to wet them and wait around 30 seconds for them to bloom. This will release the most flavor from the coffee grounds.
- Once the grounds have bloomed, slowly pour the water over the grounds, it’s best to keep the water level below the top of the Chemex, roughly a quarter-inch or more).
- Slowly pour the remaining water over the grounds, using a circular motion to ensure all grounds are evenly covered.
- Remove the filter and dispose of it.
- Pour your coffee into a mug, and enjoy! Add your milk or adjust where necessary to have your perfect cup!
Pros
• Makes multiple cups in one go
• A rich and aromatic brew
• An aesthetically pleasing way to brew coffee
• Quick brew time of 3 minutes
Con
• Fiddly to get right in terms of coffee and water volume
9. Bee House Dripper

Another way to brew coffee is with a bee house dripper. A Japanese pour-over brewer that has recently amassed a great deal of attention in the coffee world. Why? It’s easy to use and makes a great cup of coffee!
This brewer curve allows for a slower drain and works best with a coarse grind to deliver that well-needed coffee into your cup.
Remember to take care of the ceramic pot to avoid any breakages! It’s probably not the best method for those who like to brew on the road, as ceramic is fragile.
It’s a quick way to brew coffee; you are looking at a brewing time of 3-3 ½ minutes with a medium-fine grind of coffee.
It should be finer than your standard drip grind, resembling table salt.
The coffee should taste clean and clear as you would with other drippers.
But, as this drains slightly slower than other methods, you tend to get more flavor released from the coffee.
It’s an easy dripper to master, and easier to use than other drip brewing methods. Practice does make perfect with this method, though!
To brew your coffee with a bee house dripper, you can follow these simple steps below:
- Heat your water to 200-205F, which should happen around 30 seconds after the water comes to a boil.
- Weigh out and grind 22 grams of coffee. The best consistency for this method is a medium grind.
- Add your paper filter to the dripper and rinse with hot water. The rinsing will help to remove any paper taste from the coffee.
- Once the filter is rinsed, add the ground coffee into the filter.
- Set your bee house drip on top of your cup and pour the water over your coffee. At this point, just add enough to cover the coffee and wait for it to bloom. This should take 30 seconds.
- Add the remaining water using a goose-neck kettle, allowing the water to fall in a circular motion. The ground coffee should be evenly soaked with around 12ozs of water.
- Now we wait! The coffee will drip through in about 4 minutes. If it takes less time, then you have probably poured the water too quickly. On the other hand, if it takes longer than 4 minutes, you may have poured the water too slowly. It’s a learning curve that takes some practice to master.
Pros
• Ceramic holds the heat for a while
• Clean and clear-tasting coffee
• Easy to use
• Quick brew time of 3 minutes
Con
• Ceramic is fragile, and not the best for traveling.
How to brew the best cup of coffee
Following the steps of whichever coffee brewing method will best suit your needs is the simplest way to get the best cup of coffee for you and your tastes.
But what if you are following the steps, and yet your coffee is falling short of perfection? Well, we have a few handy tips we think may help you there!
Using freshly roasted and just-ground coffee will help to deliver a better taste. You can, of course, use pre-ground coffee, but the same with other food and drinks, fresh is best!
Think about the heat of your water, too; ideally, you want the water heated between 195F and 205F. Too hot, and you can burn the coffee resulting in poor taste. Too cold, and you aren’t going to release flavor and have a cup that’s packing a punch!
This is slightly different for cold brews, be sure to check out our tips for getting the best cold-brewed coffee!
Are you putting enough coffee in?
This may be the point where you laugh as if there could be such a thing as enough coffee, but it’s a valid point to consider if your brew isn’t pleasing you.
We would recommend 1.6-2 grams of whole coffee bean per 1 oz or 28 grams of water as a general guide and then adjust to taste. You could pull a Lorelai and tip the entire bag in there, but we aren’t here to judge your coffee ways, only guide.
Storage is another factor in enhancing that glorious cup.
Keep your coffee in an airtight container, out of direct sunlight. It’s best to keep away from heat, cold, and moisture too. A kitchen cupboard is a great place to store, especially as this is probably where the coffee is being made, but be sure to keep it away from any heat sources such as your oven.
Added extras
When it comes to brewing coffee, you are going to need some basics. If you are a beginner looking to branch out into the coffee world, it may seem as though there is so much to buy, and it can get a little overwhelming.
But stick with us; we will help you navigate the world of coffee brewing! Alternatively, you may be a confessed coffee brewing addict looking for the next hit or payday treat?
To start, you will, of course, need your coffee.
You can buy your coffee ground already to decant and brew, or you can grind your coffee!
You do this by buying your coffee beans and using either an electric or manual grinder, grinding the beans down to make your cup of caffeinated goodness.
The choice is yours, which you opt to do; grinding your beans allows you flexibility with how finely you grind it.
Although some best espresso beans grind differently from others, it can be a fun way to play about and achieve your desired taste from your brew.
Filters are another extra to consider.
Some methods will require standard paper filters that you can pick up in your local supermarket, and they can be quite affordable.
More specific ones may only be available online and will be an added cost to purchase. Look out for subscription services to save some money with these!
The filter can impact your coffee’s taste as, depending on the method, both your coffee and water will pass through the filter. If you are using reusable filters, make sure they are thoroughly cleaned to deliver the best taste with little corruption.
If you opt for paper, ensure these are changed as instructed and are an excellent quality to avoid any contamination of taste.
How much?
You can’t put a price on happiness, but they certainly do try when they price coffee! Everything from the bean to the machine can range dramatically in price from change to hundreds of dollars!
It’s worth setting a clear budget before you begin brewing your coffee.
Generally, you don’t need to spend a fortune on coffee to get good quality beans or ground coffee. You can, of course, treat yourself and splurge, but it’s not necessarily essential!
That being said, if the coffee is terrible, then it won’t matter how much you have spent on the machine to brew your coffee; sometimes, there is no saving coffee.
If you are someone who frequently treats themselves to a takeaway coffee, it’s worth viewing your purchase as an investment that should help cut down on the morning trip to Starbucks!
Be sure to set a clear budget if you are looking to purchase a new brewing tool, and remember that you don’t need to spend a fortune to get a good quality machine or coffee!
A french press and a bag of ground coffee can be slipped into your weekly food shop practically undetected.
Final word
Before you leave us today, let’s draw this lovely chat about brewing coffee to a close. There are lots of ways you can brew coffee, whether you are after a quick espresso or a slower drip coffee!
Brewing coffee does not have to be over complicated, and nor should it break your bank. There is a coffee brewing method to suit every budget and a method to suit everyone’s lifestyle.
We stand behind the French press and Aeropress as great ways to brew fantastic coffees that are consistently great.
Whatever method you opt for, we hope that this comprehensive guide has provided you with insight into the world as a coffee connoisseur ready to take on the brewing world!
Adam
Hailing from the United Kingdom, Adam has a wealth of experience in building websites including researching, designing, content creation and website optimisation. Adam and his team were instrumental in helping create the master plan for Portafilter and subsequently designing and launching the site. Follow on: Facebook or View all posts by AdamThis free cheat sheet will improve your coffee brew by providing quick information on brew ratio, grind size, optimal brewing time, and more.
